A basement is the largest unfinished space in most homes, and also the one most likely to be damp: the walls sit against wet soil, the floor sits on the ground, and the cool air condenses moisture easily. Homeowners who want to turn it into a bedroom or office face a real dilemma, because standard moisture-control assemblies are thick, and every inch of wall build-up is an inch taken from a room that may already be tight on headroom.
The answer is not to skip moisture control, but to choose thin, high-performance assemblies that do the same job in less depth. Closed-cell spray foam and rigid foam boards deliver insulation and vapour control in two to three inches where a framed wall with batts needs five or six, while slim furring, low-profile floors, and out-of-sight drainage and dehumidification keep the room usable.
How Basement Moisture Moves Through Walls and Floors
Basement moisture arrives by four routes, and each needs a different response. Liquid water enters through cracks, failed joints, and the wall-to-footing joint during heavy rain or a high water table. Capillary action draws ground moisture up through concrete pores and into the bottom of walls and the slab edge. Water vapour diffuses through concrete from the damp soil outside toward the drier air inside. And warm, humid air from upstairs or outside condenses on the cool concrete surfaces in summer, which is why basement walls can feel damp even when nothing is leaking.
Understanding the route matters because the wrong fix can make things worse: a plastic vapour barrier pressed against a foundation wall traps the moisture diffusing through the concrete, creating a wet cavity behind the finish. The best retrofit assemblies manage moisture rather than sealing it out absolutely: they drain liquid water away, slow vapour with a semi-permeable layer, and let the wall dry inward, where ventilation and dehumidification can deal with it.
What the Early Signs of Basement Moisture Tell You Before You Spend on Finishes
Before any framing goes up, the basement needs a moisture diagnosis. Start with the plastic-sheet test: tape a square of clear plastic, about 60 centimetres across, tightly to the wall and floor, and leave it for 48 to 72 hours. Moisture on the room side points to condensation; moisture behind the plastic means water is moving through the concrete. That distinction decides whether you need dehumidification and air sealing or drainage and waterproofing first.
Look for the other clues as well. White, powdery efflorescence is mineral salts left by water moving through the concrete. Dark staining at the base of the wall, rust on fasteners, and a musty smell that returns after cleaning all point to ongoing moisture. Check the outside too: grading that slopes toward the house, downspouts that discharge at the foundation, and clogged gutters are the cheapest problems to fix and the most common cause of wet basements.
- Efflorescence, the white powdery crust on concrete, shows water is travelling through the wall and evaporating at the surface.
- Staining or softening at the base of walls, and rust on nails or metal brackets, signal repeated wetting.
- A musty smell that returns after cleaning usually means moisture is trapped behind finishes, not just in the air.
- Grading that falls toward the house and downspouts that end at the foundation are the most common exterior causes.
- A plastic-sheet test left for 48 to 72 hours separates condensation from water moving through the concrete.
Thin-Profile Wall Assemblies That Keep Moisture Out and Space In
The thinnest reliable basement wall is not a framed wall at all. Two to three inches of closed-cell spray foam applied directly to the concrete gives insulation of around R-6 per inch, a built-in vapour retarder, and a continuous air seal in a single layer, with no stud cavity to trap moisture. The foam bonds to the wall and shifts the dew point outward, so condensation forms on the warm side of the assembly rather than inside it, and drywall on slim furring finishes the wall at about three inches total.
Rigid foam boards are the other thin option. One to two inches of extruded polystyrene or polyisocyanurate glued to the wall and taped at the seams provides insulation and a semi-permeable vapour retarder, finished with furring strips and drywall, or a framed wall held slightly off the foam so the assembly can dry inward. In both cases, do not put polyethylene sheeting against the concrete, do not fill the cavity with faced batts, and do not let wood touch the concrete. Pressure-treated bottom plates on a foam sill gasket keep the framing dry at the floor line.
| Assembly | Finished depth | Moisture behaviour |
|---|---|---|
| Closed-cell spray foam, 2-3 in | About 3 in with furring and drywall | Air seal plus vapour retarder; dew point pushed outward |
| Rigid foam boards, 1-2 in | About 3-4 in with furring and drywall | Semi-permeable; wall can dry inward |
| Framed wall with foam plus unfaced batts | About 5-6 in | Dries inward; needs a gap off the concrete |
| Direct furring strips on concrete | About 1-2 in | No insulation; only for dry basements with foam behind |
Floor Systems That Add Almost No Height
Basement floors are usually the tightest constraint, because headroom is often already at the code minimum. The lowest-profile approach is to treat the slab itself as the floor: clean it, seal cracks, and apply a moisture-tolerant finish such as epoxy coating, luxury vinyl plank, or sealed concrete. These add almost no height and cannot rot, which makes them the safest choice where moisture readings are borderline.
Where a warmer floor is wanted, a dimpled subfloor membrane with a thin plywood layer adds roughly an inch and creates an air gap that lets the slab breathe and drain, with rigid foam under it for insulation in the same thin package. Raised sleeper floors are warmer still but cost two to three inches of headroom, so use them only where the ceiling height allows. In every case the floor should be able to dry, and no wood should sit directly on the slab.
Drainage and Dehumidification That Work Behind the Scenes
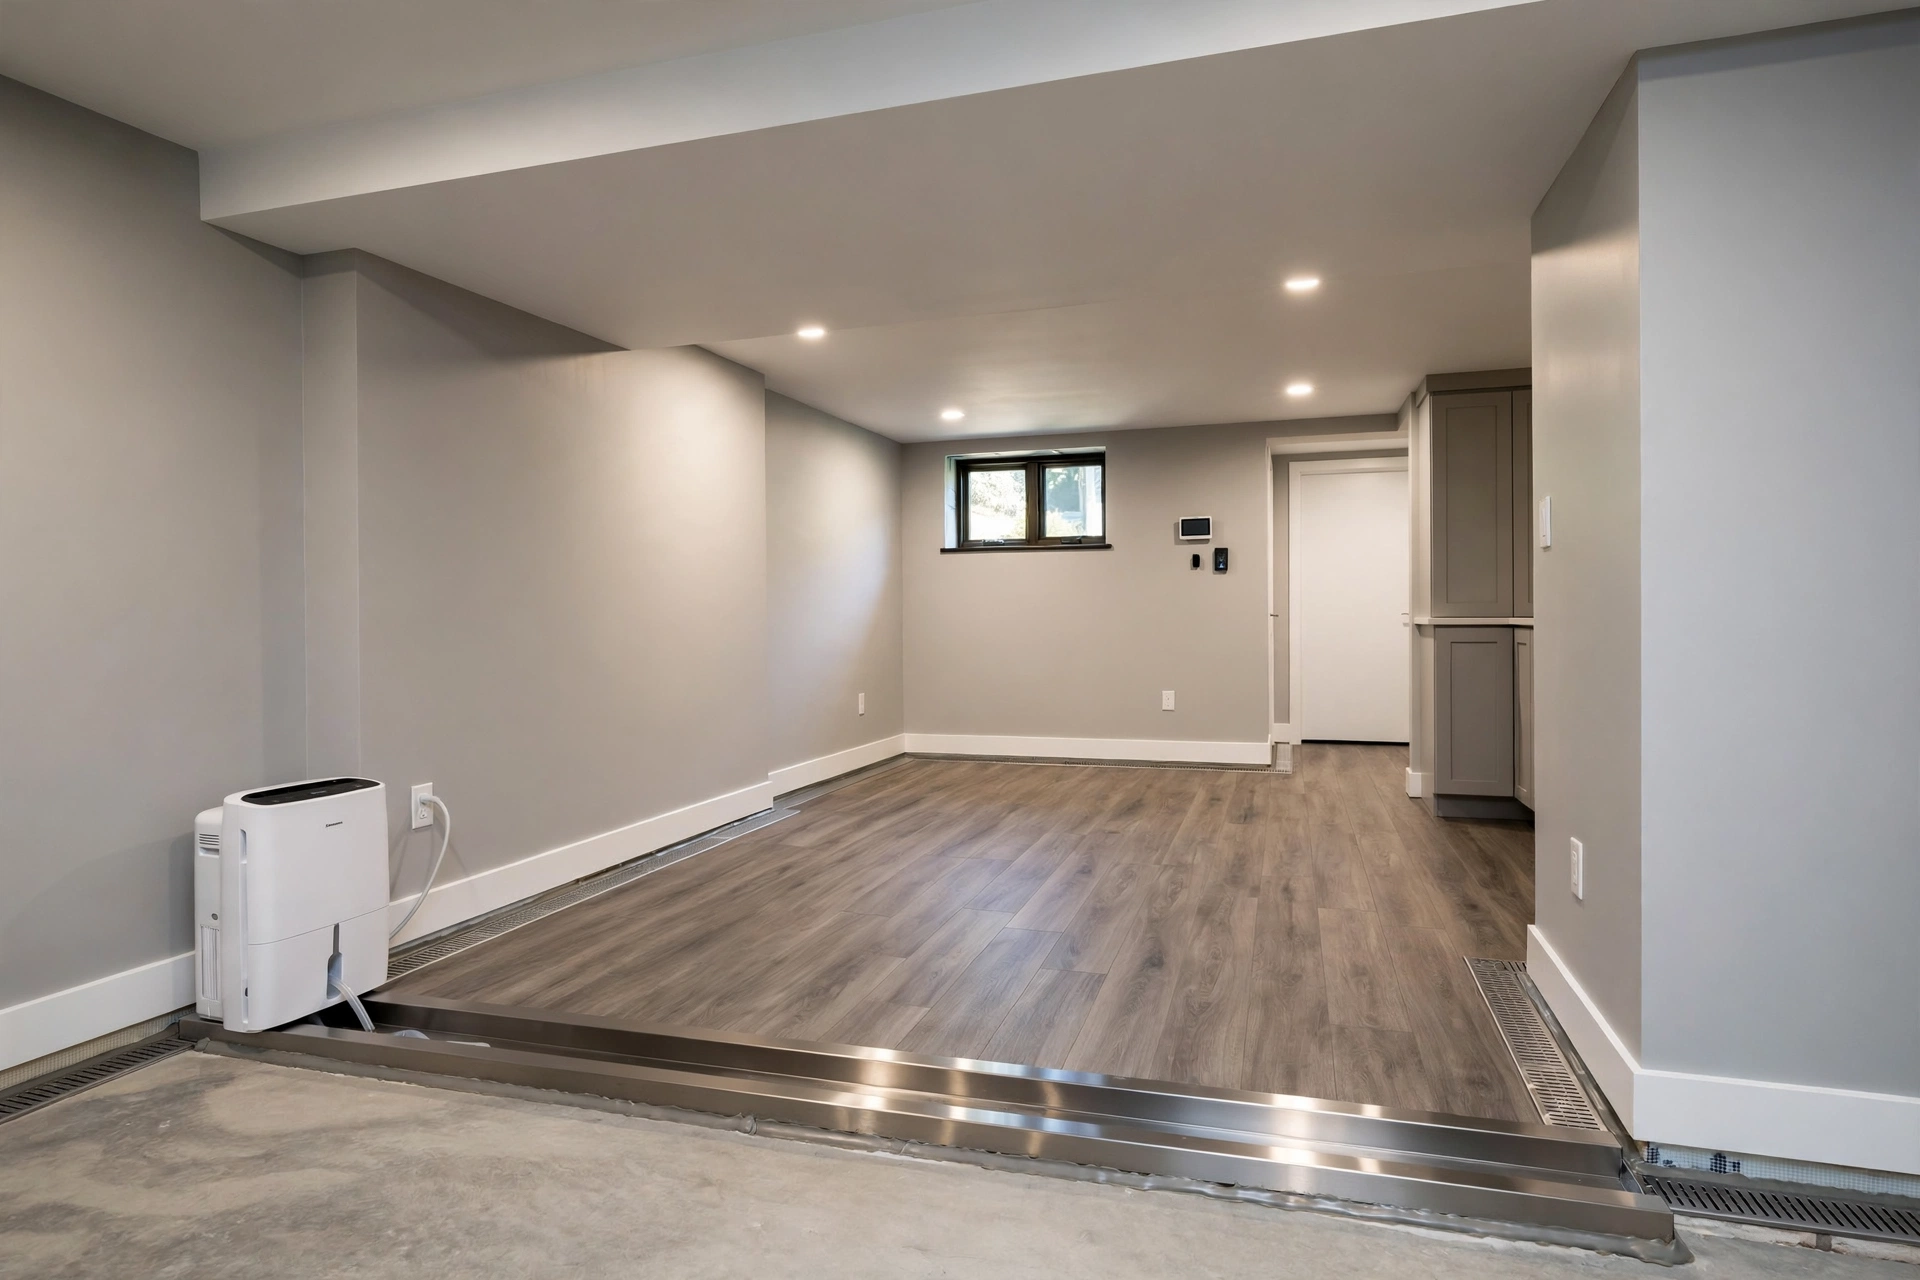
Interior drainage is the safety net that makes the rest of the assembly forgiving. A perimeter drain cut into the slab edge and connected to a sump pump catches water at the wall-to-footing joint and sends it out before it reaches the finished wall. It takes no floor space, since it sits under the floor edge, and it protects the retrofit even if exterior drainage fails during a storm.
Dehumidification is the other invisible system. A finished, occupied basement generates moisture from showers, cooking, and breathing, and the cool walls condense it readily. A dehumidifier sized for the floor area, draining to the sump, holds relative humidity in the 30 to 50 percent range that keeps mould at bay. A small supply of conditioned air keeps the air moving and prevents the stagnant conditions that make basements feel damp even when the walls are dry.
Where the Sump Pump and Drainage Lines Belong
The sump basin should sit at the lowest point of the basement, with the perimeter drain sloping toward it and a sealed lid to keep humid air and radon out of the room. Discharge lines should run outside well away from the foundation, with a check valve to stop water flowing back. Test the pump twice a year by pouring water into the basin and confirming it starts, runs, and shuts off cleanly.
Which Basement Finishes Survive Damp Conditions and Which Fail Fast
Material choice is the last line of defence. Moisture-tolerant finishes include vinyl plank and tile flooring, mould-resistant drywall or cement board on the lower walls, and metal or pressure-treated framing at the floor. Paints should be vapour-permeable where the wall needs to dry inward, and wood trim should sit above the splash zone or be rot-resistant.
The finishes that fail fastest absorb and hold water: carpet and padding on a slab, standard drywall down to the floor, and untreated wood framing in contact with concrete. Once these get wet, they stay wet, and mould follows. Use durable materials for the bottom 30 to 60 centimetres of the wall, where water damage starts, and standard finishes above, so a minor leak damages a replaceable baseboard rather than an entire wall.
- Vinyl plank, tile, and sealed concrete floors tolerate damp slabs; carpet and padding do not.
- Mould-resistant drywall or cement board on the lower wall survives minor wetting that would ruin standard drywall.
- Metal studs or pressure-treated lumber at the floor line will not rot if the slab gets damp.
- Vapour-permeable paints let a wall dry inward; impermeable coatings can trap moisture behind the finish.
- Keep wood trim above the splash zone, or use a rot-resistant material for baseboards.
Basement Moisture Retrofit Costs and the Spending Order That Protects Your Budget
The most expensive mistake is finishing first and fixing moisture later, because every dollar of finish work has to be torn out to reach the problem. The spending order that protects the budget is exterior water management first, then interior drainage, then the wall and floor assemblies, and only then the finishes. Grading, gutters, and downspout extensions are the cheapest fixes and often solve a large share of the problem.
Thin-profile assemblies can look expensive per square metre, but they save money in another way: they preserve floor area and headroom, which is the whole point of the retrofit. Closed-cell spray foam costs more than batt insulation, but it replaces the vapour retarder and air sealing in the same layer, so the comparison should be against the full framed-wall assembly, not against the batts alone. Get quotes for the whole system, not for individual products, and be wary of any contractor who proposes finishing over a damp wall without a drainage or drying strategy.
| Spending step | What it buys | Cost signal |
|---|---|---|
| Grading, gutters, downspouts | Less water reaching the wall | Lowest cost; do first |
| Interior drain and sump pump | A safety net under the finished floor | Moderate; protects all later work |
| Spray foam or rigid foam walls | Insulation, air seal, vapour control in 2-3 in | Higher per square metre; saves space |
| Low-profile floor system | Warm, dry floor with minimal height loss | Moderate; depends on the finish |
| Finishes and dehumidification | The liveable room | Varies; durable materials cost more upfront |
Basement Moisture Retrofit Questions Homeowners Ask
Can I insulate a basement wall without losing floor space?
Yes. Two to three inches of closed-cell spray foam or rigid foam board, finished with slim furring and drywall, gives a complete insulated wall in about three inches of depth. A traditional framed wall with batts needs five to six inches for similar performance, so the thin assemblies typically save two to three inches around the whole perimeter.
Should I put a plastic vapour barrier on my basement walls?
No, not against the concrete. Polyethylene traps the moisture diffusing through the wall, creating a wet cavity behind the finish. Use a semi-permeable layer instead, such as rigid foam or vapour-retarder paint, so the wall can dry inward.
How do I know if my basement is dry enough to finish?
Run the plastic-sheet test on walls and floor for 48 to 72 hours, fix any exterior drainage problems, and watch the basement through a rainy season if you can. If the walls stay dry, the test shows no moisture, and humidity holds below 50 percent with a dehumidifier, the space is ready for finishing.
Does an interior drain really help if the wall leaks?
Yes. An interior perimeter drain catches water at the wall-to-footing joint, which is where most basement leaks appear, and sends it to the sump before it reaches the finished wall. It does not stop water entering the wall, but it stops that water from reaching your floor and finishes.
What flooring is safest for a damp basement?
Vinyl plank, ceramic tile, and sealed or epoxy-coated concrete are the safest choices because they do not absorb water and cannot rot. If you want a warmer floor, a dimpled subfloor membrane with a thin plywood layer adds about an inch and lets the slab breathe underneath.
Do I need a permit to finish my basement?
In most jurisdictions, finishing a basement for habitable use needs a permit, an inspection of the framing, insulation, and electrical work, and an egress window or door for bedrooms. Check with your local building department before starting, since requirements vary and unpermitted work can cause problems when selling the house.
Final Thoughts: A Dry Basement That Still Feels Like a Room, Not a Bunker
A good basement retrofit is one you forget is a basement. Thin foam assemblies keep the walls dry without stealing floor space, low-profile floors keep the headroom, and drainage and dehumidification work quietly in the background. The discipline is in the order: manage water from outside first, give the wall a way to dry, choose finishes that forgive the occasional damp day, and only then decorate.